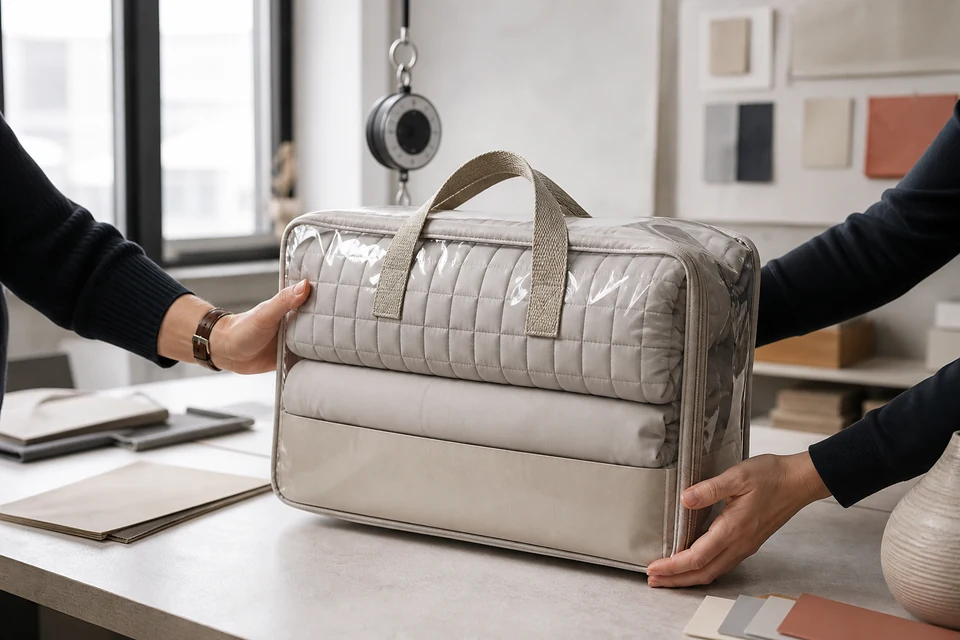
A carry handle can be the smallest component on a bedding retail pack and still determine whether the package reaches the shelf in acceptable condition. The handle carries the mass of the complete set, concentrates load at two attachment zones and influences which panel the shopper sees while carrying it. If development tests an empty bag or a lighter sample, the result says little about the final configuration. If pack orientation is not frozen, a sound handle may lift a bag sideways, distort the insert, expose a closure or place required information on the bottom. Buyers should therefore approve the handle as part of the loaded package system. The specification needs the exact pack contents, compressed dimensions, handle material and dimensions, attachment geometry, closure, reinforcement, orientation and evaluation sequence. A controlled lift and carry trial can reveal slippage, local tearing, seam opening, uncomfortable grip and poor balance without claiming a universal load rating. Packaging safety and regulatory requirements remain market- and product-specific, so the buyer should obtain the relevant evidence for the actual components and destination rather than relying on a generic statement from a visual sample.
1. Freeze the complete loaded-pack configuration
Handle approval starts with the exact mass, shape and compression state
List every product component, size, insert, board, accessory and packaging layer in the test pack. Record finished pack mass, dimensions and compression method after the agreed settling period. Use production-representative bedding because substitute fill or folded boards can move the center of mass. Link the configuration to the set pack-out completeness guide so the handle trial and shipment pack contain the same components.
Define the primary carrying orientation and the shelf-facing panel. Show where the closure, insert, product fold and barcode panel sit relative to the handle. If several SKUs share one bag size, test the lightest and heaviest or otherwise justified risk cases rather than assuming one result covers all. Keep the approved pack build on the SKU master and bill of materials so a fill-weight, board or fold change triggers review.
- Record complete contents, mass, dimensions and settling condition.
- Freeze product fold, insert, closure and shelf-facing orientation.
- Select representative SKUs for shared packaging honestly.
- Link the test build to controlled SKU and BOM revisions.
2. Specify handle material and attachment geometry
Webbing alone does not define how load enters the package
Record handle material, finished width and length, thickness, edge finish, color and supplier reference. Define attachment spacing, overlap, stitch pattern, seam allowance, reinforcement patch and relationship to the bag panel or zipper. If the handle is heat sealed or otherwise bonded, name the controlled construction and acceptance evidence. Use the nominated trim control guide when a buyer-specified webbing or fastener needs source and change control.
Draw the attachment map from finished-pack landmarks rather than only from the unfilled bag. Filling can shift side panels and rotate attachment points. Inspect sharp edges, exposed cut ends, abrasive surfaces and places where stitching can capture the product. A handle that looks centered on the flat bag may not balance the loaded pack, so construction approval and orientation approval must happen together.
- Identify webbing, reinforcement and joining construction.
- Dimension attachment points from the loaded pack reference.
- Check cut ends, sharp edges and product-contact zones.
- Control source changes for visible or load-bearing components.
3. Design a controlled lift and carry trial
Define actions and observations before testing the sample
Create a sequence reflecting intended handling: vertical lifts, controlled holds, short carries, set-downs and agreed turns or transfers. State the sample conditioning, operator method, repetitions and inspection intervals. Additional static or cyclic loading may be appropriate, but the method and load must be documented for the specific pack rather than borrowed without context. The objective is to compare the approved construction with the buyer's handling scenario, not to publish an unsupported strength claim.
Observe handle elongation, stitch movement, seam opening, panel whitening, plastic tear initiation, zipper distortion, insert displacement, product shift and grip behavior. Measure pack orientation after lifting and note whether the display face remains upright. Photograph both attachment zones before and after under consistent views. If a failure occurs, preserve the sample and load history so reinforcement or geometry changes can be evaluated against the same sequence.
- Define load, conditioning, actions, repetitions and inspection points.
- Use the complete pack rather than an empty packaging shell.
- Inspect both attachments and adjacent bag and zipper zones.
- Record balance, grip and display orientation after handling.
4. Link handle orientation to artwork and pack-out instructions
A strong handle cannot correct a pack built upside down
Mark top, bottom, front, back and opening direction in the packaging specification. Connect those references to insert artwork, product photography panel, barcode access and any required market information. Use the artwork version-control guide to keep the physical orientation and released print files synchronized. Avoid relying only on an arrow printed on a component that may be hidden during packing.
Create a visual pack-out instruction using the approved sample, but pair each view with controlled SKU and revision identity. Conduct a line trial with normal operators and observe rotation, reversed inserts, trapped handles and closure interference. The shelf-ready folding and pack-dimension guide helps align product fold and package presentation. Correct ambiguous folds or fixtures before bulk rather than sorting orientation at final inspection.
- Define every pack face and the intended carrying direction.
- Tie artwork and barcode panels to physical pack references.
- Run a normal-speed pack-out trial for orientation mistakes.
- Revise instructions when product fold or inserts change.
5. Inspect bulk attachments and retain the tested pack
Sampling must cover component lots and production periods
Build inspection fields for handle identity, dimensions, attachment position, stitch or bond construction, reinforcement, orientation, closure and loaded-pack dimensions. Sample across packaging-component lots and relevant production periods. A simple pull by hand may identify obvious defects but should not replace the approved controlled sequence. Use the final inspection checklist to link findings to carton and shipment disposition.
Retain an approved loaded pack, unfilled component references, drawings, trial record and bulk summary. Reopen review when mass, fold, bag material, zipper, handle, attachment or artwork changes. Buyers can request a complete packaging sample, review the private-label development route, and state pack configuration and handling requirements in the buying brief. This makes the carry handle a controlled functional component rather than a decorative afterthought.
- Inspect identity, dimensions, attachment and orientation by lot.
- Use the approved loaded sequence for confirmation samples.
- Retain one complete tested pack and component references.
- Reapprove when the product mass or packaging system changes.
Approve the handle with the real pack: freeze contents and orientation, control attachment geometry, run a documented lift-and-carry sequence, verify pack-out and retain bulk evidence by component lot.