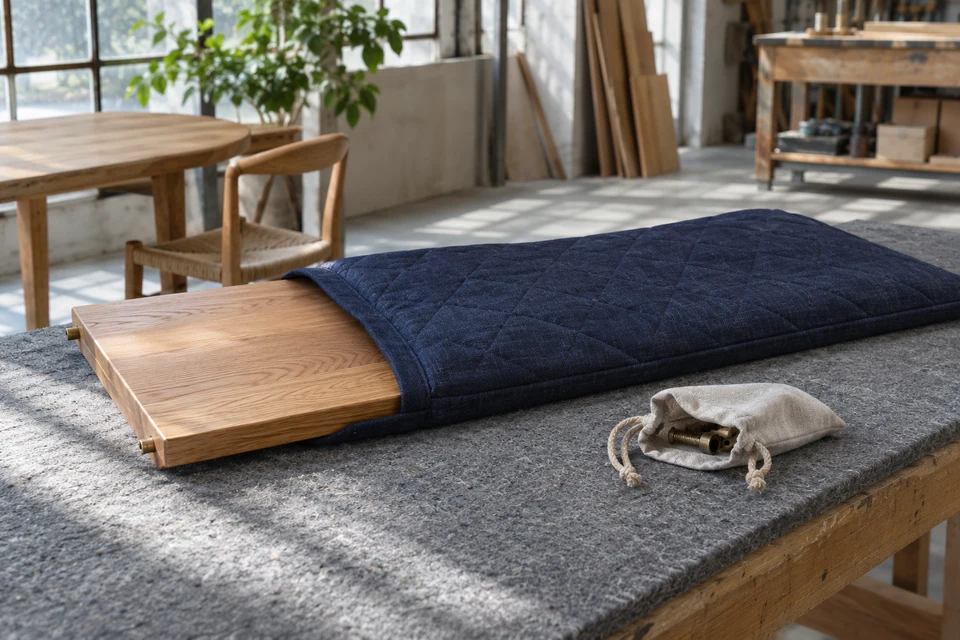
An extension leaf can come out of a table clean and acquire its first mark on the way into storage. The culprit need not be the outer fabric. It might be a pin brushing the facing, a zip pull tucked inside the opening or a bag of fittings placed on top of the finished surface. Decide where each of those parts goes before choosing the quilting pattern.
Trace the panel in storage condition
Include projections and the direction of travel
Remove a representative leaf according to the furniture maker's instructions. Work on a clean supported surface and record the panel as it will be put away. Measure the length and width of the finished face, then identify where a locating pin, latch or short apron extends beyond that outline. Mark which projections stay attached. Do not assume that a customer can or should remove a fitting merely to make a bag easier to sew.
Draw an arrow along the proposed insertion direction. A pin projecting from the leading edge can catch the lining before the broad face is safely inside. A shallow apron on the underside may pass through the mouth but increase the thickness at a particular point farther down. Include a side profile at that point. If the range includes several leaf lengths, ask whether the projections are really in the same places before calling the longer bag universal.
Choose an opening that reveals the leading edge
Compare a simple sleeve with a wider wrap
Try a plain open-ended sleeve on the supported leaf. Observe the first moment at which the handler can no longer see the leading corner. If the handler has to probe for it or shake the panel into place, try a side-opening wrap that closes around a stationary leaf. The wrap needs more finishing and creates a longer closure line. The sleeve uses fewer components but may make the operator move the heaviest part more often.
Turn each empty sample inside out and feel the route of the finished face. Look for rough seam ends, hard closure components or quilting threads that can trap debris. Use a finish sample or a representative sacrificial piece for contact trials with the furniture maker; do not experiment on a customer's valued table. Ask the maker to approve the surface compatibility and storage conditions separately. A soft hand in the fabric library is not a guarantee for every finish.
Give loose fittings a separate address
Check the packed arrangement under ordinary handling
Put the correct removable hardware in a small pouch and draw its intended position on the storage plan. A pocket sewn over the middle of the face keeps the kit together but can place concentrated pressure exactly where protection is wanted. A separate bag in the storage compartment or a pouch at an end beyond the panel footprint may be better. If the pouch travels separately, make clear how the owner matches it to the right table.
Pack and unpack the same kit in the order a showroom associate or homeowner will use. Can the hardware drop between liner and leaf when someone opens the bag? Can an end pouch fold back over the face when the whole package is laid down? Photograph the assembled kit from the side as well as from above. Specify the storage orientation agreed by the furniture maker. Do not present a storage sleeve as a rated carrying case or protective shipping package.
Quote the bag against the furniture family
Keep replacement information understandable
For each table model list the number of leaves, the dimensions of a single stored leaf, the permanently attached projections and the loose hardware arrangement. State whether the customer receives one bag per leaf or a multi-piece kit. Two unseparated leaves in a single soft envelope present a different contact problem from one leaf per sleeve. Request a divider sample if the programme genuinely needs shared storage.
Use an internal identifier visible when the bag is empty but kept clear of the finished face. Keep the approved open-bag photograph with the furniture revision, not merely with the fabric swatch. A later change from a flush catch to a proud latch should reopen the fit assessment even if the tabletop dimensions have not changed. This is also the moment to ask how fabric colour minimums apply across models and which component will be available as a spare.
Send a traced outline, side profile, projection map and a list of loose hardware. Ask for a sample that a handler can fit and remove without sliding metal across the finished face.