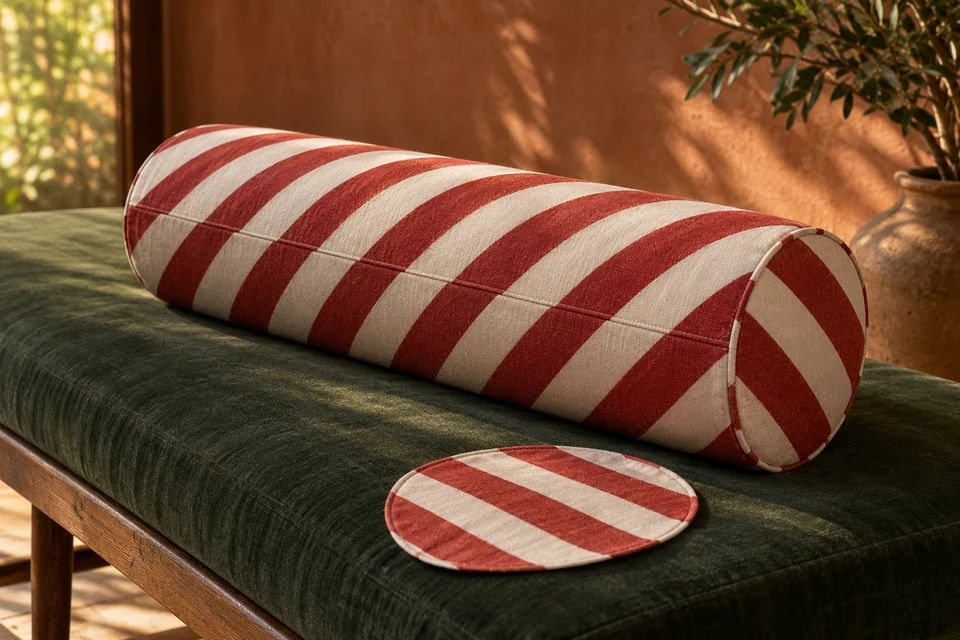
Diagonal red-and-ivory stripes make a simple cylindrical cushion look like a seasonal product, but the cylinder exposes joins that a flat fabric swatch cannot show. The stripe may appear to jump at the long seam or meet a circular end in an unintended arrangement. Buyers should decide which relationships matter before asking the supplier to match a reference photograph. A deliberate stripe layout is more useful than an undefined request for perfect candy-cane alignment.
Draw the stripe route on the cylinder
Decide where continuity is actually required
Identify the long body seam and the two circular end joins on a simple product drawing. Mark the seam position intended to face away from the customer, if any, and specify whether the stripe should continue across it. Do not assume a flat diagonal repeat can maintain every relationship around every circumference without a layout change. Ask the supplier to show the proposed panel arrangement before sewing.
The pattern placement guide helps distinguish motif matching from general dimensional accuracy. Choose a clear reference point for the stripe at the seam. If a deliberate offset is acceptable on the concealed underside, record it; otherwise different reviewers may reject or accept the same sample for different reasons.
- Identify the body seam and its intended display position.
- Mark required matching zones and any explicitly accepted offset.
Treat circular end caps as separate artwork views
Do not let an arbitrary cut decide the end appearance
Specify what the visible circular end should show: a centered stripe, a deliberately offset band or a separately designed end panel. Compare both ends, because turning an identical cut piece can change the apparent direction of the diagonal pattern. Define left and right only relative to a clear reference view so instructions remain understandable when the cushion is handled.
Use the size-set approval process when more than one diameter or length is offered. A layout that works on one circumference is not automatic approval for another. Keep the end-cap reference alongside the body panel reference, and include seam allowances so the finished visible circle is not confused with the original cut disc.
- Approve both end views on the filled cushion.
- Keep cut-panel and finished visible boundaries distinct.
Place the closure without sacrificing the chosen stripe
A hidden opening still affects the assembled view
Ask how the cover is filled and removed, where the opening sits and whether a zipper or overlap interrupts the matched area. Review the actual closure operation on the chosen insert. Pulling the cylinder into shape by force can temporarily disguise a mismatch, so inspect the cushion resting naturally after fitting. Record the insert dimensions used for this review.
The zipper approval guide can support a zippered proposal. Do not move an opening late in development without checking the stripe again. Any piping or contrasting trim at the circular ends also belongs in the approved construction because it can hide, emphasize or change the apparent alignment at the join.
- Check the opening on the actual proposed insert.
- Reapprove the layout after a closure or end-trim change.
Assess red and ivory in the complete sample
A stripe design makes contrast changes conspicuous
Keep the approved color reference and the actual fabric construction together. Review the body, ends and any separately sourced trim under the agreed lighting conditions. A strong contrast makes differences between panels easy to notice, but photographs alone do not establish whether the material satisfies a color or care requirement. Record what the physical sample shows and what further evidence is needed.
Use the colorfastness evidence plan to discuss appropriate evaluation for the materials and intended use. This article supplies no test result or guaranteed resistance to color transfer. After an agreed care trial, review both the stripe appearance and the seam relationship; an attractive unwashed sample is not the only relevant reference.
- Link color references to the exact supplied fabrics.
- Keep care evidence separate from visual approval under one light.
Quote matching requirements before calculating quantities
The visible layout is part of the commercial scope
Give suppliers the required seam and end relationships when requesting a quotation. Ask how those choices affect cutting layout, sampling and minimums rather than treating them as free finishing details added after pricing. Distinguish a cover-only offer from an insert-included product, and identify whether all sizes share one stripe scale or have separate artwork.
The fabric width and cutting-yield review is useful when discussing layout implications. Keep any supplier estimate tied to the proposed fabric and dimensions, not to an assumed universal waste percentage. Confirm the approved sample and pack before releasing quantities, then agree a realistic seasonal production plan without an unsupported arrival promise.
- Include matching requirements in the original quotation brief.
- Approve size, stripe scale and insert scope together.
Send FY Bedding the bolster dimensions, intended insert and candy-cane stripe reference. Mark the joins that must align and the desired end-cap views. Request a filled sample and a quotation based on that exact layout before approving the Christmas assortment.