Banquet chair covers often fail for reasons that a flat measurement table cannot show. Chairs carrying the same model name may have different back curves, seat thicknesses, leg spacing or protective feet; replacement inventory may introduce another frame; and a cover that looks tailored on one sample can twist, lift or pool when staff fit hundreds of chairs under time pressure. Laundering adds another layer because a small dimensional change can move a seam onto the visible face or shorten floor clearance unevenly. Buyers should treat the cover, chair and setup method as one system. The project brief needs a chair inventory, approved silhouette, fabric direction, seam map, opening route, floor-clearance rule and care process. A fitted mock-up then tests not only appearance but installation, removal, stacking and housekeeping workflow. This does not mean every banquet program requires the same construction or a fully tailored fit. Some properties prefer a relaxed drape, others use stretch construction, and mixed chair inventories may need separate patterns. The objective is to make the chosen result measurable and repeatable so quotation, sampling, laundering and bulk inspection teams are not working from a styled photograph alone.
1. Build a chair and use-case matrix
Furniture variants determine pattern count before fabric is chosen
Identify each chair model, frame supplier reference where available, back height and width, seat width and depth, seat thickness, leg spacing, arm or handle details, protective feet and stack configuration. Measure representative physical chairs rather than relying only on a furniture drawing. Note repaired upholstery, replacement seats and mixed production batches that change the effective profile. Connect the matrix to the hospitality project route so ballroom counts, meeting-room variants and replacement quantities remain visible.
Define how the chair is used while covered: dining, conference, ceremony, staging or storage. Record guest-facing sides, aisle clearance, trolley or stacking requirements and whether the cover stays on during movement. If several chair variants can share one cover, prove that through fitted samples on the dimensional extremes. Do not force one pattern across incompatible frames merely to reduce SKU count; the resulting setup time and inconsistent presentation can outweigh the apparent simplification.
- Record chair geometry, frame details and representative variants.
- Identify repairs or replacement components that change the profile.
- Map use, movement, stacking and guest-facing presentation.
- Prove any shared pattern on the smallest and largest intended chairs.
2. Freeze the approved silhouette and pattern references
Fit language must be translated into measurable landmarks
Describe the intended silhouette with finished landmarks: back apex, shoulder curve, side seam, seat break, front and side drop, corner position and floor clearance. State which areas should follow the frame and where ease or drape is intentional. Measure from stable chair references after the cover has been installed without pulling it into an artificial position. The size-set approval guide is useful when several cover patterns or chair sizes must be confirmed before cutting.
Create a controlled pattern revision and link it to the exact chair identity and physical mock-up. Mark grain or stretch direction, mirrored pieces, notches and any asymmetric hardware clearance. If fabric width or stretch behavior changes, recalculate paneling and fit instead of copying the old pattern by name. Preserve photographs as supporting evidence, but keep dimensioned drawings and the approved sample as the controlling references.
- Name fit landmarks on the chair and finished cover.
- Separate intentional ease from unwanted looseness or twist.
- Control pattern revision, grain direction and asymmetric clearances.
- Recheck fit if fabric construction or usable width changes.
3. Engineer seams, openings and floor clearance
Construction must support both presentation and fast handling
Draw the seam map on front, back and side views. Specify seam type, allowance, pressing, topstitching where visible and permitted join locations. Keep main joins away from high-friction chair edges when the construction allows, and check whether seam bulk prints through the face. Use the seam and stitch specification guide to define workmanship without relying on one prototype's appearance.
Define the installation opening, closure and any tie, hook-and-loop, zipper or elastic component by material and position. Test whether staff can fit and remove the cover without dragging it across the floor or overstressing the closure. Measure floor clearance at all relevant sides on a level surface, then repeat after the chair is moved and occupied if the project requires it. Pooling fabric can look elegant in a staged photo but create handling, soil or trip concerns in operation, so the property must approve the real clearance.
- Map seams and closures from stable chair landmarks.
- Specify seam allowance, pressing and visible stitch rules.
- Test installation without overstretching or floor dragging.
- Measure clearance around the full chair in normal use.
4. Run setup, removal and laundry trials
The sample must work for the team that handles it repeatedly
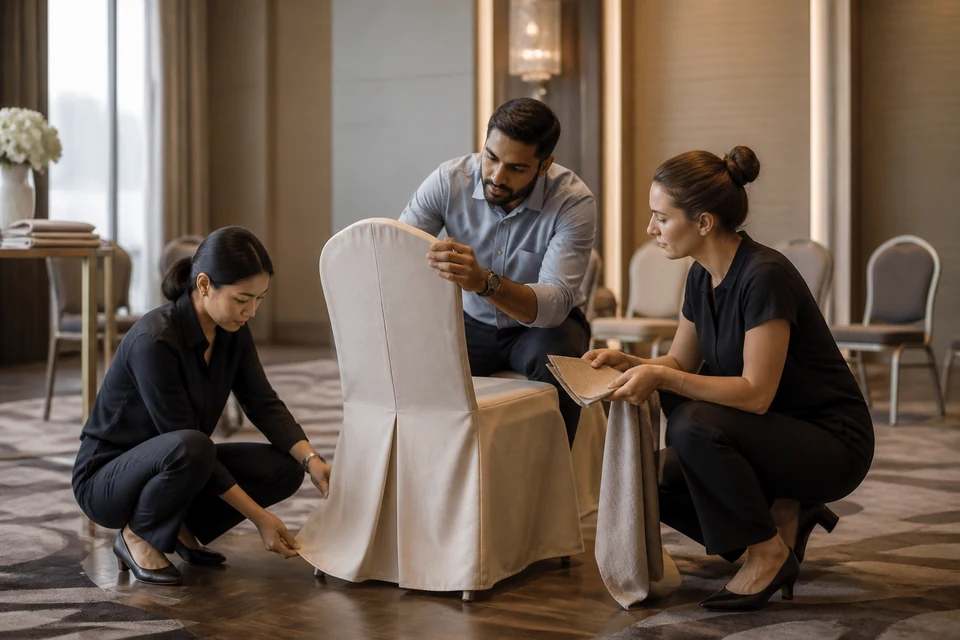
Ask banquet staff to cover, align, move, uncover and stack a controlled number of chairs using normal practice. Record time observations only as project data, not as a universal productivity claim. Note orientation mistakes, difficult closures, fabric snagging, seam stress and the amount of adjustment needed for a consistent room. The hotel handling-time trial offers a related structure for separating product design from operator and method effects.
Process samples through the agreed laundry and finishing route, condition them and refit the same chairs. Compare dimensions, twist, seam position, closure function, shade, surface appearance and floor clearance. Link cycle identity to the hotel linen wash-trial guide. If finishing includes pressing or steaming, define the production method and allowable operator variation; a sample that fits only after exceptional hand shaping is not a stable bulk reference.
- Observe normal staff fitting, movement, removal and stacking.
- Record adjustment points instead of styling the sample silently.
- Refit the same chairs after the documented care sequence.
- Review closure, twist, dimensions, seams and floor clearance.
5. Inspect bulk by chair type and preserve reorder controls
A mixed inventory requires stratified sampling, not one easy chair
Build the inspection sheet from chair type, cover SKU, fabric lot, pattern revision and production lot. Check finished dimensions and workmanship flat, then fit representative samples to the correct chairs. A bulk lot should not be released solely from one presentation sample. Use the final inspection checklist to link construction findings with pack count, shade grouping and shipment disposition.
Retain the approved chair matrix, patterns, pre- and post-care samples, setup record and bulk summary. Reopen affected approvals when the property replaces chairs, changes care suppliers or alters fabric and closures. Buyers can request fitted mock-ups, review related hospitality textile programs and share chair photographs, dimensions and quantities in the buying brief. This gives cooperation factories a verified pattern target rather than an unqualified chair-cover category.
- Stratify bulk checks by chair, SKU, fabric lot and pattern revision.
- Fit sampled covers on the correct representative furniture.
- Retain washed references and the staff handling record.
- Reapprove fit when chairs, fabric, closure or care route changes.
Approve chair covers on real furniture: map chair variants, freeze the silhouette and seam route, run staff and laundry trials, then inspect and retain references by chair type and pattern revision.