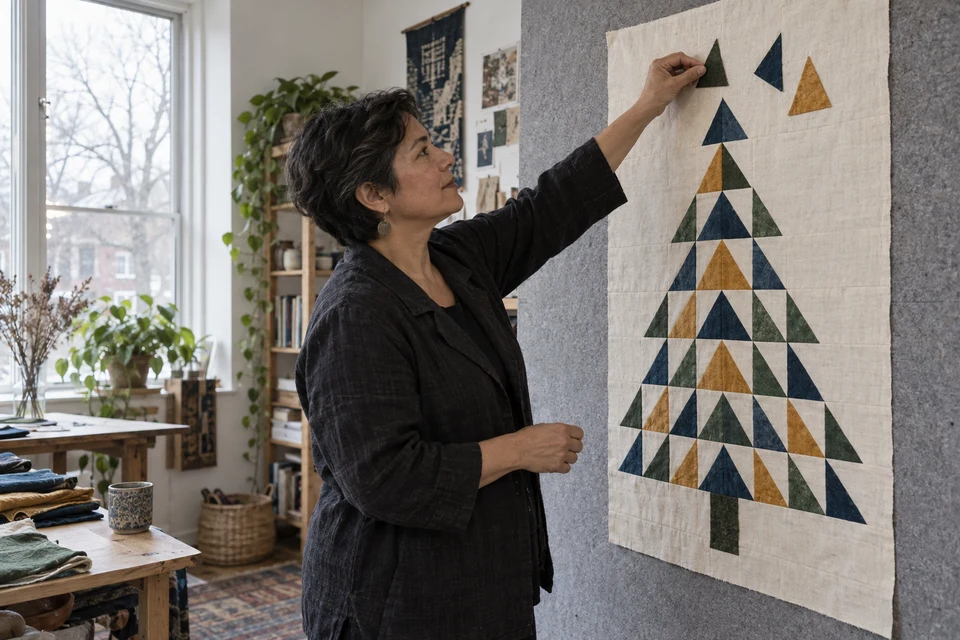
A tree-shaped patchwork panel depends on the relationship between its rows. Individual triangles can look well made while the assembled tree leans, narrows unexpectedly or loses its intended color rhythm. Buyers should approve the whole panel at defined stages, not only a selection of attractive blocks.
Identify the assembled design
Keep patchwork and quilting decisions distinct
Specify whether the tree is assembled from separate fabric pieces and how the finished panel is layered and stitched. The V&A distinguishes patchwork, which joins fabric pieces into a design, from quilting, which stitches layers together. The procurement checks here are proposed review steps for this tree panel, not a museum-issued manufacturing standard.
Use printed versus assembled patchwork choices if that construction decision is still open. Once assembled patchwork is selected, prepare a row map showing triangle orientation, color placement, background pieces and the tree trunk. Give each row an identifier in the working specification, while keeping the final product free of those development markings. Agree whether small intentional asymmetries belong to the design or whether the tree is expected to follow a balanced outline.
- Approve a complete row map with color and orientation information.
- Separate the pieced face approval from the later quilted-panel approval.
Set useful alignment references
Measure the tree, not just the outside rectangle
Mark the tree's vertical reference line, top point, widest row and trunk position on the drawing. Record the relationship between those features and the finished panel edges. An outer rectangle can be square while the tree inside it appears shifted; conversely, a centered tree can sit inside an uneven border. Inspect both relationships explicitly.
Ask the supplier to propose achievable acceptance limits using a physical sample. Avoid copying a general dimensional tolerance onto every triangle junction without considering the intended appearance. The dimensional planning guide helps separate a nominal size from an agreed acceptance range. Use normal display distance for the whole-tree judgment, then inspect selected junctions close up. Keep those two views in the record so local detail does not overwhelm the overall silhouette decision.
- Record top point, trunk and widest row against the panel centerline.
- Agree whole-panel and local-junction criteria separately.
Approve rows before the face disappears into layers
Catch sequence errors while they are still visible
Lay out the assembled face and compare each row with the approved map. Check triangle direction, color order and the continuity of the tree's outside edges. A reversed triangle in a background area may create an unintended notch; a swapped dark block can make one side appear heavier even when dimensions are correct.
Inspect seams at the points where several pieces meet and look for visibly clipped tips or unexpected gaps in the intended geometry. Record the observation without assuming a particular sewing cause. Where fabric orientation matters, use face-and-back identification to prevent inconsistent surfaces entering the same panel. Retain a dated photograph of the accepted assembled face before quilting, linked to the material and row-map revisions. This creates a useful comparison if the final panel later looks different.
- Compare every row against the map rather than checking a few blocks.
- Retain a full-face photograph before adding the final layered finish.
Review the finished panel again
Quilting lines are another visible design layer
Inspect the panel after its agreed quilting and edge finish. Compare the tree outline and border spacing with the earlier face photograph. Look at the relationship between quilting lines and triangle edges: the stitching may intentionally follow, cross or contrast with the patchwork, but that relationship should be approved rather than accidental.
Use quilting stitch-continuity review for the line quality and any repair appearance. Hang the actual panel using the intended support arrangement and observe it from the front and side. Keep support approval separate from piecing approval; the wall-hanging sleeve guide covers that interface. A flat tabletop view cannot establish how the finished piece presents vertically, especially if its border no longer lies as intended.
- Compare pre-quilting and finished photographs of the same panel.
- Approve both hanging presentation and local stitch appearance.
Preserve the approved outline through packing
Choose folds around the visible tree structure
Trial the proposed fold or roll with the finished panel. After the agreed storage condition, display it using only the preparation expected at the destination. Check whether a crease falls through the tree center, whether corners turn inward and whether the hanging outline returns to the accepted appearance. If preparation is required, describe it accurately rather than showing an exceptional studio result as the normal unpacked condition.
Keep the row map, materials, pre-quilting image, finished sample and pack trial together. A later color substitution or revised triangle size should trigger review of the whole tree, not only the changed piece. Share that evidence with FY Bedding when developing a seasonal wall-quilt program. Confirm construction, sample scope and timing before treating the design as available inventory or making a Christmas delivery promise.
- Record the final pack route and post-unpacking display condition.
- Recheck the whole tree after a block-size or color-sequence change.
Does the final hung and unpacked panel preserve the approved tree outline, row sequence and border relationship shown in the assembled-face reference?
Method references: V&A: distinction between quilting and patchwork.