Cut panels can leave the cutting table at the wrong size even when the marker and cutting machine are correct. Fabric held under roll tension may contract after opening, knitted or stretch constructions may distort during spreading, and tall lays may shift or compress so upper and lower plies do not match. Heavy weights, aggressive alignment or a rushed relaxation period can create a flat-looking lay that is not dimensionally neutral. Buyers should therefore connect material condition, spreading method, lay height and cut-panel verification in one release record. There is no credible universal relaxation time or ply count for every fabric. The required route depends on construction, finish, roll history, storage, width stability, cutting method and product tolerance. A supplier should establish the control from evidence for the named material and then preserve it through bulk and reorders. This guide focuses on operational verification rather than suggesting arbitrary hours or layers. It also distinguishes cut-panel dimensions from finished-product shrinkage: cutting accuracy can be controlled well and the product can still change during care, so both stages need their own specifications and evidence.
1. Identify material condition and roll history
Relaxation decisions start before the roll reaches the table
Record fabric article, construction, finish, width, roll and lot identity, storage condition, package form, receipt date and any compression or temperature exposure relevant to the process. Inspect roll tension, edge curl, telescoping, creases and visible distortion. Use the incoming fabric inspection guide to connect these observations with width, shade and defects rather than treating relaxation as an isolated timer.
Define the release route for the actual material: open width, folded, tubular or another form. If the supplier has historical dimensional observations, confirm that the evidence matches the same construction and finish. A rule copied from another material may be misleading. Preserve the selected bulk roll and retained reference identity so later contraction or width findings can be traced back to incoming condition.
- Record construction, finish, roll, lot and package history.
- Inspect tension, curl, creasing and roll distortion at release.
- Use material-specific evidence for the relaxation route.
- Keep incoming and cutting identities connected.
2. Establish a relaxation method and endpoint
Elapsed time is only one part of a repeatable condition
Define how the fabric is opened, supported and protected, including layer arrangement, edge freedom, room conditions and start time. Avoid hanging or stacking in a way that creates new tension or crushing. Measure width or other agreed landmarks at defined intervals on trial material to determine when change is sufficiently stable for the project. Record actual observations instead of publishing one fixed number without context.
Set an authorized endpoint and escalation route for rolls that do not stabilize as expected. The sample-conditioning guide provides a broader framework for time, temperature and handling records. Relaxation status should be visible on the lay ticket so the spreading team cannot release a roll only from memory or production pressure.
- Define opening, support, room condition and start time.
- Use agreed interval measurements on material trials.
- Document the stability endpoint and exception route.
- Carry relaxation status onto the cutting release record.
3. Control spreading tension, alignment and lay height
A relaxed roll can be distorted again during spreading
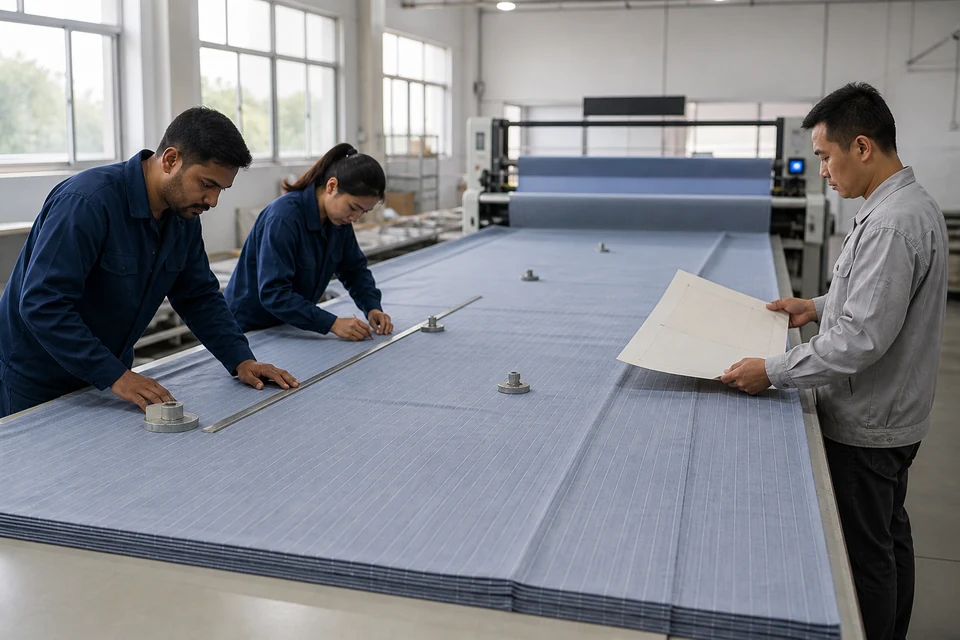
Specify spreading direction, face orientation, end treatment, edge alignment, permitted tension and rest between passes where needed. Operators should not stretch fabric to force width or marker alignment. Record machine or manual spreader settings and check the first layers for contraction after placement. For directional, nap or patterned materials, connect the lay plan to the nap-direction guide or the relevant pattern control.
Set maximum lay height or ply count from evidence for fabric stability and cutting capability. Measure at named positions without compressing the stack. Review edge lean, bow, trapped creases, layer shift and end tension. Use weights only in the approved type and location; heavy local weights can hide misalignment. If the lay changes during production, stop and preserve the affected range rather than trimming all edges into apparent alignment.
- Define spreading direction, face, tension and end treatment.
- Check first layers for post-placement contraction.
- Control lay height at named points without compression.
- Map edge lean, creases and shift before cutting.
4. Verify first, top, middle and bottom cut panels
Panel sampling reveals drift through the lay
Measure first cut panels against the controlled pattern at stable landmarks, not only the bounding length and width. Include notches, curves, closure openings, panel diagonals or alignment marks relevant to assembly. Condition panels as defined and avoid stretching them flat. Use templates or gauges with revision identity and record actual measurements. The size-set sample guide helps ensure all sizes are released rather than extrapolated from one easy panel.
Sample top, middle and bottom plies from the lay to reveal shift, knife deflection or compression effects. Keep ply position with each result. Compare paired and mirrored pieces, and review frayed, fused or dragged cut edges where relevant. If panels fall outside the approved route, isolate the affected lay and trace relaxation, spreading and cutting settings before authorizing recut or reuse.
- Measure product-specific landmarks, not only overall size.
- Keep template or pattern revision with every result.
- Compare top, middle and bottom ply positions.
- Isolate affected lays before recut or alternate use.
5. Link cut bundles to sewing and finished results
Cutting evidence becomes useful when it follows the product
Assign lay and bundle identity to cut pieces and record material roll, shade lot, marker, size, ply range, cutting time and inspector. Use the traceability and lot-coding guide so sewing and final teams can return to the correct cutting record. Review first sewn pieces for seam alignment and finished dimensions; assembly findings may expose a panel issue that was missed at the table.
Compare cut-panel records with post-care finished-product results without merging the two acceptance stages. The dimensional stability guide covers the care-related question. Retain relaxation trials, lay tickets, panel samples and corrective evidence for repeats. Buyers can review the quality route, request a size-set sample and include critical dimensions in the buying brief. Revalidate when fabric, finish, roll form, spreader, lay height or cutting method changes.
- Trace panels through lay, bundle, sewing and finished lot.
- Review first sewn pieces against the cut-panel record.
- Keep cutting accuracy and care shrinkage as separate controls.
- Revalidate after material, spreader, lay or cutter changes.
Control panel size before sewing: identify roll history, establish a material-specific relaxation endpoint, spread without renewed tension, sample through the lay and trace bundles into finished-product evidence.