Direction errors in bedding are rarely repaired after sewing. A panel turned across the warp, a reversed face or a one-way motif cut in the opposite direction may only become visible when pieces are assembled or viewed under room lighting. Roll labels, selvedges and printed arrows can be removed during spreading, while some solids, brushed surfaces and subtle jacquards look similar in both directions at the cutting table. Buyers need a material-direction definition that survives receipt, relaxation, spreading, cutting, bundling and sewing without depending on operator memory. This guide is a procurement-control framework, not a substitute for the buyer's specification, a test standard or a contract. It intentionally avoids invented factory capabilities, certificates, universal tolerances and automatic legal conclusions. The useful outcome is a repeatable approval and evidence route that lets design, production, quality, logistics and receiving teams compare the same item under stated conditions.
1. Identify face, selvedges and directional behavior
The roll reference must be established at receipt
Build the control around the real end-use sequence. Record fabric article, roll and shade lot, then identify both selvedges, technical face, warp direction, nap or pile direction and any one-way visual motif. This matters because Assuming the rolled-out side is always the face can fail when suppliers wind, inspect or re-roll material differently. Refer to the golden-sample approval workflow for the wider sourcing workflow, then identify sample, method, conditions and reviewer in the feature record. Separate development exploration from the final released rule so production teams know which observations are informative and which are mandatory.
The evidence pack should make the outcome understandable without relying on memory. A signed material-direction card with photographs and a marked retained swatch should resolve ambiguous surfaces before cutting. Cross-reference the incoming-fabric inspection guide, retain before-and-after views when a trial changes the product, and document the affected lot when a finding appears in bulk. Correction is not closure until the changed quantity is verified again under the same rule and the authorized disposition is recorded.
- Identify both selvedges.
- Confirm technical and approved face.
- Check nap, pile and motif direction.
- Retain a marked reference swatch.
2. Translate direction into pattern instructions
Every panel needs an orientation rule
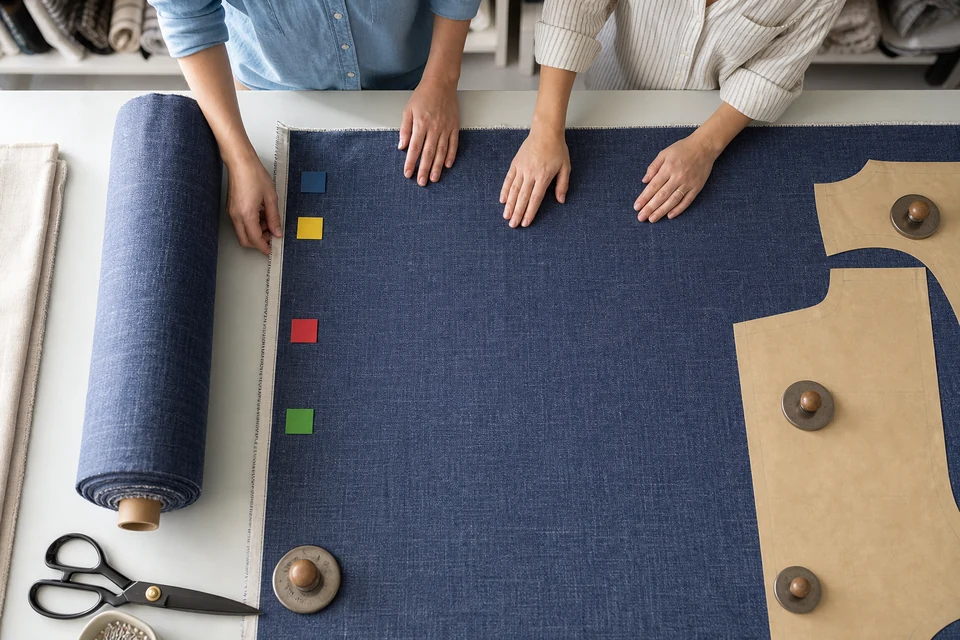
Mark warp direction, top edge, face and any pair-matching rule on pattern pieces or digital markers for shells, borders, flanges and decorative components. Begin with the released buying specification and the actual sample identity; do not let a convenient workshop convention become an unstated requirement. A marker optimized only for yield can rotate pieces that require shared visual or mechanical direction. Buyers can place this control beside the pre-production sample guide so material, construction and inspection decisions refer to the same revision. Record who checked the point, when it was checked and what product or lot was represented.
The released marker plan and pattern revision should show permitted rotations and special rules rather than leaving them as oral instructions. The record should distinguish an observation from an acceptance decision and identify any approved deviation. Compare results with the final-inspection checklist, then state the hold, correction, recheck or release route. This prevents photographs and measurements from becoming detached files that cannot explain a production or sourcing decision later. Keep commercial disposition with authorized buyer and supplier representatives rather than embedding an automatic claim in the inspection method.
- Put direction arrows on every relevant pattern.
- Define permitted panel rotation.
- Identify paired and mirrored pieces.
- Control marker and pattern revisions.
3. Preserve direction during spreading
Lay build must carry the approved reference
Treat this point as a controlled handoff, not a final visual glance. At roll opening and relaxation, maintain roll identity; during spreading, record face-up or face-to-face mode, start end, ply count, splice and direction. The practical risk is specific: Turning a partial roll or joining lots without a documented orientation can reverse a section inside an otherwise correct lay. Use the AQL sampling guide to connect development and bulk controls, and capture the product size, color, lot, production stage and applicable revision. When the condition varies by size or configuration, show the range explicitly instead of approving one convenient specimen for every variant.
Evidence must be sufficient for another reviewer to reproduce the conclusion. Lay tickets, end markers and first-ply verification create a visible route from roll to cut stack. Link the result to the FY Bedding quality route and preserve original measurements as well as any summary. A failed or uncertain result should remain on hold until an authorized disposition identifies affected quantity and the required reinspection. This disciplined route is more useful than adding an unsupported numerical limit after production has already begun.
- Keep roll identity through relaxation.
- State lay face mode and start end.
- Mark splices and partial-roll turns.
- Verify first and final plies.
4. Verify first panels under useful lighting
Measurement alone does not expose visual reversal
A buyer-ready specification names the reference, method and decision owner. Compare first-cut panels with the marked master for dimensions, face, warp, motif and surface direction under lighting that reveals nap or sheen. Without that discipline, Closely woven sateen or brushed materials can appear correct under diffuse factory light but shift tone when paired on a bed. The lot-traceability guide can provide the surrounding approval gate, while the article-specific record captures the feature itself. Include production-representative conditions and note any substitute equipment, material or mock-up component that could affect interpretation.
Close the check with traceable evidence rather than a pass stamp. Side-by-side and rotated comparisons with photographed disposition help distinguish directional appearance from shade variation. Review it together with the sample request route, record deviations by location and quantity, and show what was reinspected after correction. If buyer and supplier have not agreed a numerical tolerance or test route, report measured findings and request disposition; do not invent a threshold that could be mistaken for a standard or contractual promise.
- Check dimensions and orientation together.
- Use lighting that reveals surface direction.
- Compare paired panels side by side.
- Hold cutting when direction is uncertain.
5. Carry direction through bundles and sewing
Cut accuracy is lost if components are mixed
Build the control around the real end-use sequence. Mark bundles by lay, roll lot, size, face and orientation, and keep paired components together until sewing assembly. This matters because Rebundling, recuts and line balancing can introduce a reversed piece after the cutting room has passed its checks. Refer to the packaging and carton approval guide for the wider sourcing workflow, then identify sample, method, conditions and reviewer in the feature record. Separate development exploration from the final released rule so production teams know which observations are informative and which are mandatory.
The evidence pack should make the outcome understandable without relying on memory. Bundle tickets, recut authorization and inline comparison with the approved sample close the traceability loop. Cross-reference the buying brief, retain before-and-after views when a trial changes the product, and document the affected lot when a finding appears in bulk. Correction is not closure until the changed quantity is verified again under the same rule and the authorized disposition is recorded.
- Label bundles with orientation and lot.
- Control recuts against the original rule.
- Keep paired components together.
- Inspect directional appearance inline.
Define direction at the roll, encode it in patterns and lays, verify first panels visually and preserve the reference through bundles, recuts and sewing.