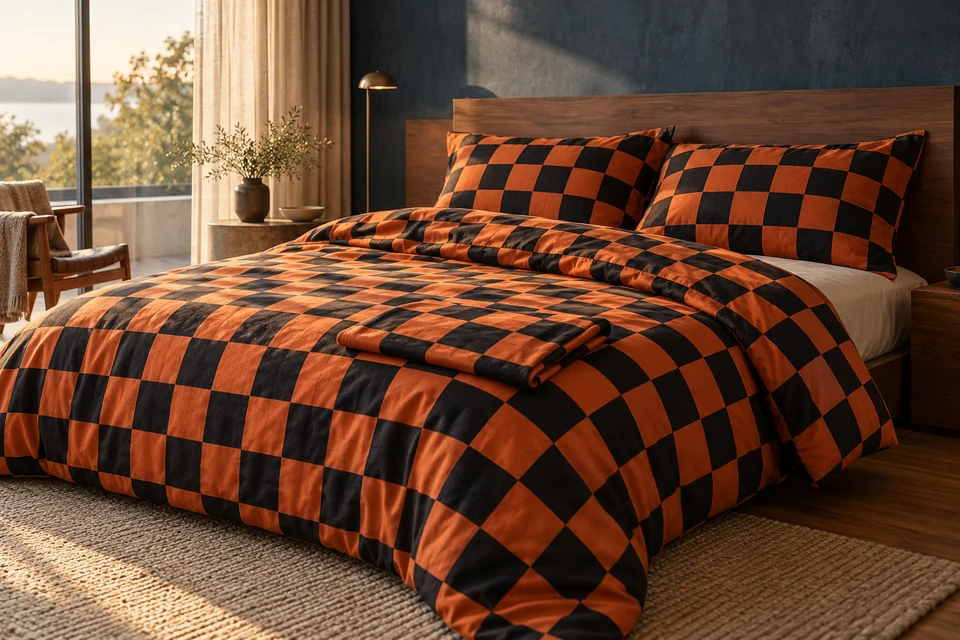
Checker bedding offers a Halloween palette without a literal ghost or pumpkin illustration. That apparent simplicity makes the joins conspicuous: a half check beside a full check, a different starting color on the second pillowcase, or a turned-back edge that interrupts the rhythm can change the entire bed view. Buyers should approve the grid as a relationship between finished components, not merely accept a swatch with attractive colors. The key decision is which boundaries require registration and where an ordinary cut through the repeat is acceptable.
Describe the grid before choosing the cutting rule
Check size and starting position are different instructions
State the intended finished check dimensions and identify the orange and dark squares with physical color references. Ask whether the proposal is printed or yarn dyed, and keep that construction explicit in quotations. A digital checker layout does not establish the achievable finished grid after fabric preparation and sewing. Request the actual proposed ground and decoration route before approving repeat size or making a claim about its origin.
In the technical pack, mark the grid origin on each component: a full dark square at one corner is a different instruction from centering a dark square on the face. Draw the complete repeat beyond the cutting boundary. This makes it possible to see whether the required finished width can end in the same phase on both sides without changing the chosen check size.
- Record check dimensions, colors and construction independently.
- Show the repeat continuing beyond every finished boundary.
Choose the matching requirement at the duvet opening
An opening has more than one visible state
Identify the opening edge and its construction, including any flap, facing or concealed closure. Decide whether the adjacent visible rows should continue the face grid or form an intentional contrast. Photograph the proposed sample closed and open far enough for normal insert access. A match made by folding the flap specially for a photograph is not a repeatable construction approval. Keep an unrestricted opening trial separate from the styling image.
The duvet closure guide helps describe the functional route. Add a close view showing where each colored square meets the finished seam. If exact registration requires additional cutting allowance, request that assumption in the quotation. Do not call a less expensive unmatched option equivalent; identify it as an alternative with a different appearance boundary.
- Approve closed, opened and naturally turned-back views.
- Distinguish a deliberate contrast band from accidental mismatch.
Make the two pillowcases a defined pair
Matching colors alone do not establish matching phase
Lay the two pillowcases side by side in their intended bed orientation. Note whether the openings face inward or outward and whether the first complete check at each visible edge should match. Turning one finished case over may reverse the apparent arrangement, especially when front and back are cut differently. Decide whether the pair is identical, mirrored or intentionally offset before ordering quantities as sets.
Refer to the pillowcase pair approval for the distinction between an individual face and a bed arrangement. Here the reference is the checker phase, not mirrored illustration. Retain a simple pair photograph with the openings indicated in the sample record, then show the packaging team which two approved variants belong together.
- Mark opening direction on both reference cases.
- Keep identical and mirrored pair options on separate order lines.
Review every size without silently stretching the checks
A larger cover can need a different edge treatment
Start with the largest and smallest proposed sizes on a scaled layout. A fixed check size can leave different partial squares at the edges of each size; stretching the pattern to avoid that changes its visual scale. Select the acceptable compromise deliberately. A wider size may also require a join, so review both grid alignment and seam location rather than assuming the narrow-size sample represents the entire range.
Use the bow and skew review when the grid appears distorted. Separate fabric distortion from an intended cutting phase. Compare a relaxed flat sample with the same cover on its nominated insert, because folds and filling can make straight lines look curved. Record those conditions instead of judging all dimensions from a styled photograph.
- Approve partial edge checks for each size explicitly.
- Separate geometric fabric distortion from cutting alignment.
Release a cutting reference and a set reference
The sample decision must survive packing and replenishment
Retain one approved flat component record and one complete made-bed record. The first supports cutting and seam inspection; the second supports the buying team's visual decision. Ask the supplier to explain which components share fabric and which require distinct positioning. Confirm minimum quantities for the actual variants rather than treating every size and pair orientation as interchangeable stock.
Use the set pack-out checklist to reconcile the duvet and pillowcase identities. Reopen a packed sample and compare the pairing again. The generated editorial image is a design illustration, not confirmation of a particular construction, color result or available inventory. Establish sample approval and a current production timetable before planning any seasonal launch.
- Keep flat cutting evidence alongside the complete bed view.
- Confirm the exact size, opening and pair variant in each pack.
Send FY Bedding your proposed check size, size range and opening preferences. Request a complete pair-and-duvet layout plus a sewn sample showing the visible joins. Approve the intentional edge cuts and quantity split before releasing the Halloween checker collection.