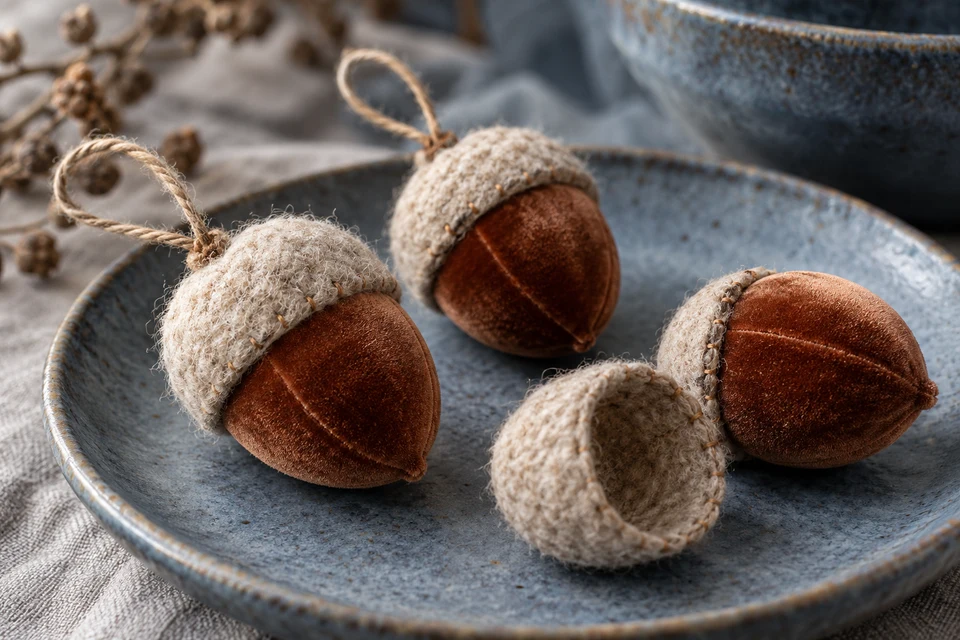
A textile acorn ornament is recognizable through the relationship between a rounded cap and a tapered soft body. Making either part independently attractive is not enough: the overlap can shorten the visible body, alter its apparent width or conceal the actual connection. Buyers should approve the assembled proportions and ask how any hanging loop connects through the construction. The concept is a decorative textile object, not a natural seed or a product whose material content can be identified from a photograph.
Separate the cap and visible-body proportions
Overall height can hide a different overlap
Draw the complete acorn and identify the cap height, visible body height and widest points. Record the overall dimensions with the sample resting or hanging in a stated condition. Two ornaments can share the same total height while showing very different amounts of body below the cap. Decide which proportion defines the intended range and keep the drawing separate from the internal cut-piece dimensions used by the maker.
Place the proportion reference in the technical specification pack. Ask for a cap and body shown separately as well as one assembled sample. This makes the overlap understandable before it is hidden by trim or a finished connection. Confirm the offered materials and filling scope explicitly; a velvet-like surface or felt-like cap in an editorial image is not a verified composition statement.
- Record visible body height independently from overall height.
- Retain separate-component and assembled references.
Approve the cap fit around the body
A snug visual fit should not rely on hidden reshaping
Place the proposed cap over the actual finished body and review the junction around the full circumference. Look for uneven overlap, an unintended gap or a cap edge that pulls the body out of shape. Ask the maker to explain the intended assembly route rather than forcing the sample into a preferred silhouette by hand. Decide whether a softly irregular edge is a design feature or a correction still needed.
Use the construction reference process for the cap edge and attachment area. If the cap diameter or body fullness changes, repeat the complete fit review. A small adjustment to one piece can move the widest point of the assembled ornament. Do not approve a revised cap on an old body sample and assume the final combination will match once both changes are produced together.
- Review overlap around the complete junction.
- Test revised cap and body components together.
Retain a clear body axis and lower tip
The soft seed shape should remain distinct from a ball
Observe the body from the front and side with the cap installed. Identify the intended taper and lowest point. Ask how the proposed filling or inner construction maintains that form without an undeclared support. A fuller body may look appealing but shorten the visible taper; a leaner body may change the cap fit. Review those choices as a linked proportion decision rather than selecting cap and body samples independently.
Keep the accepted views in the retail photography record. Show normal cloth texture and any accepted seam placement. Avoid retouching the lower tip into a sharper shape than the sample maintains. Editorial images illustrate the purchasing question, while actual product photographs and the physical reference establish the agreed merchandise appearance for the selected size and construction.
- Check taper and lower tip after installing the cap.
- Keep fullness changes linked to the cap-fit decision.
Trace the hanging connection through the assembly
A loop at the top does not explain what it is attached to
If the ornament hangs, identify where the loop enters and which component carries its connection. Ask for an exposed assembly view before the cap conceals the junction. State whether the loop is integral, separately attached or supplied as another component. Keep the connection explanation specific to the proposed design rather than assuming that the cap alone holds the whole ornament because the cord appears to emerge from its top.
Use the buyer resources to record the intended display use and relevant verification questions. Review the natural hanging angle and whether the body remains aligned beneath the cap. Do not turn an acceptable hanging photograph into a numeric strength claim or a broad statement about user safety. If the loop position or cap connection changes, repeat both the exposed-junction review and the ordinary hanging view.
- Identify the actual component carrying the loop connection.
- Review natural alignment after any connection revision.
Compare the packed set with the assembled reference
Pressure at the cap can change the apparent proportions
Trial the actual pack with the agreed number of acorns and any temporary restraints. Check whether neighboring pieces press against caps, flatten the body tips or trap the loops. Open the pack and photograph the immediate assembled shapes before smoothing them. If the product is supplied as a mixed-size set, verify the counts and proportions of each size rather than checking only one representative ornament.
Use the pack review framework to retain the before-and-after comparison. Request minimums and prices for the complete cap, body, loop and pack combination. Confirm the sample sequence and feasible dispatch plan before a seasonal commitment. A larger acorn should receive a renewed overlap and hanging review; enlarging the outline does not establish that the same cap construction or packing arrangement remains appropriate.
- Inspect cap overlap and body taper immediately after unpacking.
- Approve each size in a mixed set with its own assembled reference.
Provide FY Bedding a cap-and-body proportion drawing and the required hanging scope. Request separate components, an exposed connection and a complete packed set. Approve overlap, body taper and ordinary hanging alignment together before releasing the acorn ornament order.