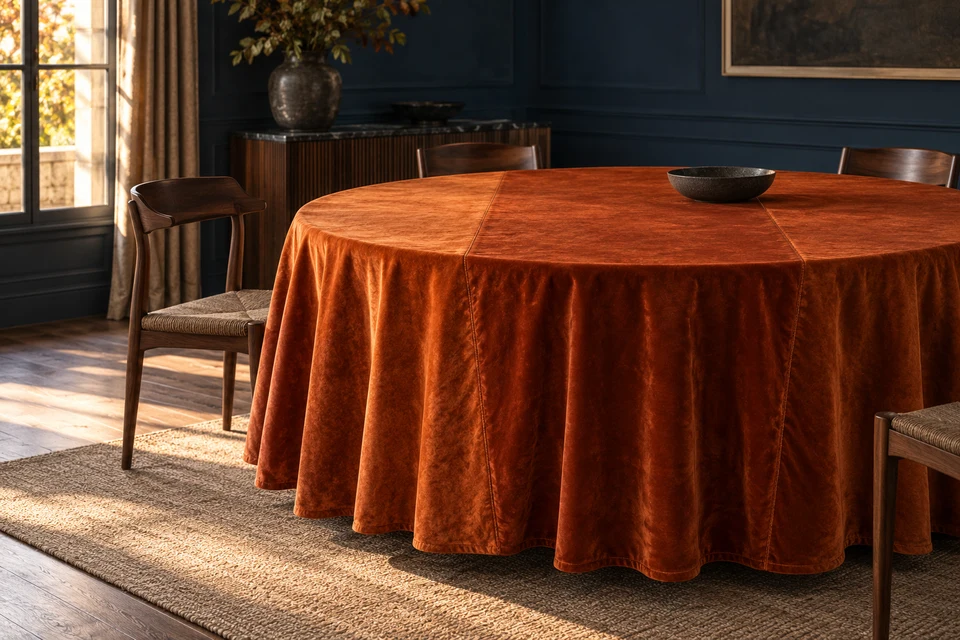
Orange or charcoal velvet can create a rich Halloween dining display without a printed motif. On a large round tablecloth, however, the fabric width and pile direction can matter as much as the selected shade. Joined panels may reflect light differently, and a view approved from one chair may not represent the other side of the table. The buyer needs a deliberate panel-and-nap plan, not a promise that a round cloth will appear uniformly colored from every direction.
Start with the finished circle and the usable fabric width
The cutting plan should explain every join
Record the actual table diameter and the intended drop, then establish the finished cloth diameter. Ask the supplier to show how that circle is cut from the proposed usable fabric width. A large central panel with two side pieces is different from a radially pieced design. Neither should arrive as an unannounced substitute for a seamless-looking image. Keep hem allowance separate from the finished measurement.
Use the technical-pack record to attach a panel map. Mark each join relative to the center and table edge. Identify whether a join remains on the tabletop or descends into the drop. That distinction affects its visibility and contact with the setting, and it can vary when the same cloth is placed on another table size.
- Request a cutting map based on usable width, not nominal roll width.
- Show which joins cross the tabletop and which fall below it.
Specify the nap rule on every panel
Matching the fabric name does not define the direction
Mark a direction arrow on each panel of the proposed layout. Decide whether all pieces follow one fabric direction or whether a deliberately changing arrangement is part of the design. A circular cloth does not have one viewing position, so the approval should describe the expected directional effect rather than demand an undefined uniform shade. Ask to see the actual proposed velvet before deciding how strong that effect may be.
The velvet nap and pack-mark review explains why direction and surface condition need separate records. Here, compare adjacent sewn widths on a curved display. Turn the whole cloth rather than brushing one panel selectively for the camera. If the supplier proposes a different velvet construction, repeat the comparison instead of carrying over the original sheen approval.
- Draw a nap arrow for each cut piece.
- Keep an intentional directional effect distinct from a shade defect.
Walk around the complete dressed table
Review the join from several guest positions
Place the sewn sample on the nominated round table and arrange the normal setting without covering every seam with props. View the cloth from several positions around the circumference and at standing and seated heights. Note where the join becomes conspicuous and whether folds expose a different surface appearance. Retain wider photographs showing which side of the room the light comes from.
Use the inspection photograph guidance for close views, but do not substitute a close photograph for the circular display review. Keep the sample orientation consistent when comparing lighting conditions. Decide whether the buyer accepts the visible seam as construction, prefers it relocated or wants a differently sized product that changes the required panel arrangement.
- Review more than the single most flattering viewpoint.
- Record accepted seam visibility with the light direction identified.
Approve the seam relief and curved hem separately
A satisfactory shade match can still leave an unsuitable edge
Inspect the joined widths on the face and reverse. Record the chosen seam treatment and observe whether its bulk creates a ridge through the velvet surface. Then review the circular hem as it hangs, including any puckering or uneven turn at the side pieces. Avoid prescribing a universal construction before the actual fabric and intended care have been evaluated; request alternatives when the first sample does not meet the brief.
The seam and stitch guide provides the construction record. Link any agreed care trial to this joined and hemmed sample. Fabric-only evidence cannot establish the finished cloth's appearance after handling or care. Do not add heat-resistance, stain-resistance or venue-compliance claims based on the table styling.
- Review join relief and hem appearance as different checkpoints.
- Retain evidence for the finished construction, not only the base cloth.
Compare quotations against the approved panel map
Yield assumptions should not silently change the design
Ask each offer to identify the fabric, usable width, finished diameter, panel arrangement and nap rule. A lower material allowance may reflect a different seam layout or directional cutting choice, not simply a better price. Separate optional contrast panels from a single-color construction and identify any size for which the planned joins differ. Confirm material minimums for the chosen colors and widths.
Use the packaging approval checklist to review a folded and reopened cloth. Record the proposed fold and the appearance after the agreed unpacking treatment. The generated image is an editorial concept, not a shade standard, verified velvet composition or current stock offer. Confirm the sample route and delivery plan before committing to an event date.
- Compare commercial offers against identical panel and nap assumptions.
- Reopen the actual proposed pack before final appearance approval.
Ask FY Bedding for a round-cloth panel map based on your table, drop and proposed velvet. Review the nap arrows, joins and full circular display, then confirm the pack, quantities and current production timetable for the seasonal program.