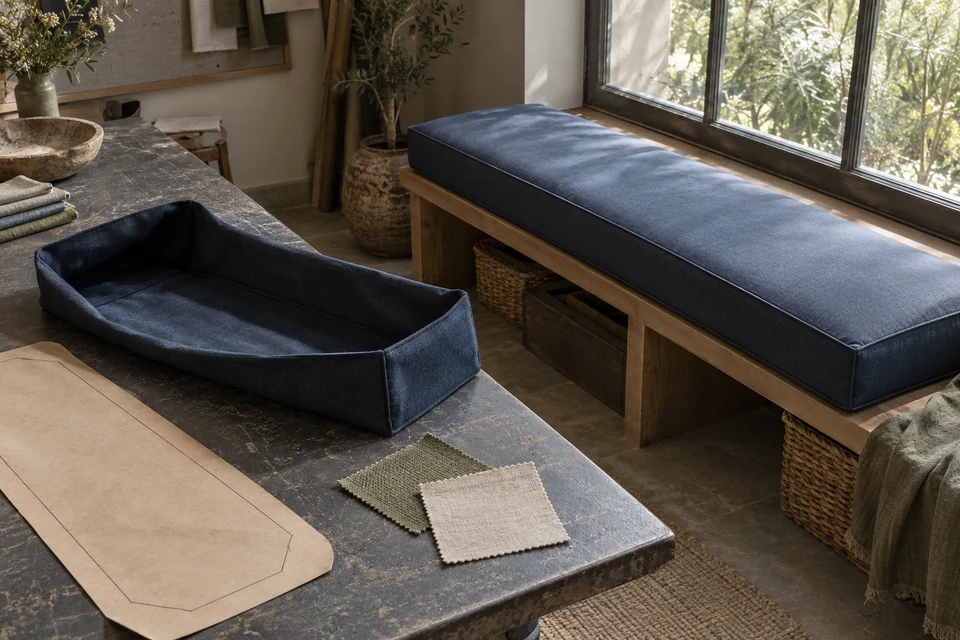
A removable box cushion cover for a bench or window seat is shaped around an insert's three-dimensional form. Ordering it by the visible top length and width alone can leave the maker guessing about depth, corners, taper and opening access. This purchase is different from a thin dining-chair pad with external ties: the cover must enclose a defined insert and be removable under the intended maintenance routine. The guide concerns the textile cover and its fit. It does not approve a seating structure, foam specification, load-bearing arrangement or destination compliance, all of which need their own responsible technical owners.
Establish the insert reference
Pattern the actual shape rather than a furniture nickname
Identify the insert that the cover must enclose, including the finished shape, depth, corner radii, taper and any orientation that matters. State whether it is an existing sample, a controlled drawing or a new insert being developed by another supplier. The bench's external dimensions may not equal the insert's dimensions. Use a stable template or measured reference with revision identification, and put it in the technical pack before asking the maker to quote a supposedly standard cover.
For a fitted window seat, record how the cushion sits against walls, returns or shaped ends. Decide which face and edge should be visible and whether the cover needs different top and bottom constructions. The seat-pad template guide offers a useful method for controlling furniture references, but it does not define this enclosing cover's gusset or opening. Do not copy a dining-pad tie layout into a boxed cushion merely because the photographs look similar.
- Identify the actual insert and its revision.
- Record depth, taper and corner shape.
- Mark the intended visible face and orientation.
- Keep the box-cover pattern separate from a tied seat-pad layout.
Choose the gusset and seam map
Judge the edge all around the insert
Request a drawing showing the top, bottom and gusset pieces, the seam positions and any piping. Decide whether the gusset is continuous or joined and where any join will appear. Examine the seam map on a covered insert rather than only on an empty flat cover. The piping construction guide can support component questions, but the accepted cord, seam capture and joins still need to be specified for the actual cushion cover.
Compare square-looking and softly rounded corner proposals deliberately; neither is automatically correct for every insert. Record the appearance the designer wants and how the sample achieves it without distorting the insert. A maker's proposed allowance may depend on the offered textile and insert surface, so do not impose a universal negative-ease percentage. If the design changes from a single bench cushion to several neighboring cushions, assess visible seam alignment and spacing between them as a new presentation arrangement rather than splitting the original pattern informally.
- Approve the seam and piping map on the filled cover.
- Identify all gusset joins and intended hidden edges.
- Choose corner appearance against the actual insert.
- Reassess the presentation when one cushion becomes several.
Make the opening a maintenance decision
Insertion and removal must not depend on excessive force
Specify the opening location, length and closure arrangement with the intended insert available. Ask the responsible team to fit and remove the cover using the approved handling method. Observe whether the opening gives practical access, whether the insert is forced into an unsuitable bend and whether the closure can be operated normally afterward. The zipper approval guide helps identify components, while the full-cushion trial reveals access limitations a loose zipper sample cannot show.
Keep the opening away from the intended visible or contacting face when that is part of the design brief, but do not sacrifice workable access solely to hide it. Record any guard, overlap or finishing that separates the closure from the insert and user's contact. If a prototype can be fitted only after an unapproved modification to the insert, reject that method as a complete-sample approval. The insert supplier and textile maker should resolve compatibility together rather than ask the receiving team to trim or change bulk inserts to suit the covers.
- Use the released insert for fitting and removal.
- Observe access without excessive force or insert modification.
- Review closure contact and visibility when filled.
- Resolve cross-supplier compatibility before bulk release.
Review fabric direction and care
Repeat the filled-cover approval after relevant processing
Document the fabric face, direction, repeat and intended relationship between top and gusset pieces. For patterned or directional surfaces, inspect the complete covered bench under the room's intended lighting. The pattern-matching guide can organize the design references. Material selected for a decorative appearance still needs appropriate project-specific evidence for the actual contact and use; the textile name or photograph is not proof of abrasion performance, color-transfer limits or care compatibility.
Agree the proposed cleaning method and conditioning state with the technical owner, then repeat the relevant dimensional and fit checks. The dimensional-stability guide helps separate material change from sewing or measurement variation. Check the top, gusset, corners and opening together. Do not approve the cover's post-care suitability from a flat fabric strip while ignoring the finished assembly. If the insert cannot follow the cover's care route, state clearly how the two are separated and handled rather than publish an ambiguous whole-cushion care instruction.
- Freeze fabric direction across all visible pieces.
- Request evidence relevant to the actual use.
- Repeat fit checks on the conditioned cover.
- Separate cover care from insert care where necessary.
Quote and control the cover family
Cover-only supply should preserve insert compatibility
List each cover size and shape, the compatible insert reference, fabric color and quantity. Clarify whether the quote is for covers alone or complete cushions, and whether pattern development, inserts, packing or installation are included. The quotation-basis guide explains why a headline unit price is not enough for a fair comparison. Minimums should be confirmed for the offered textile and sewing pattern, especially when several shaped variants cannot share the same material layout.
Retain an accepted cover-and-insert combination for the approval record even when only covers are bought. Record what remains valid if the insert supplier changes foam shape, surface wrap or another interface. Use the supplier change-control guide to route those revisions through the right owners. Buyers can submit a removable bench-cover brief with the insert template, visual direction, cleaning plan and quantity matrix. Confirm the feasible supply scope instead of assuming a complete seating product is available from a textile-only discussion.
- Identify compatible inserts on every cover variant.
- Separate cover-only and complete-cushion prices.
- Confirm minimums against the actual pattern family.
- Reopen interface approvals after insert or material changes.
Release a boxed cushion cover against an identified insert, approved seam map and workable removal method. Keep fabric direction, post-care fit and cover-only supply limits visible throughout quotation and repeat orders.