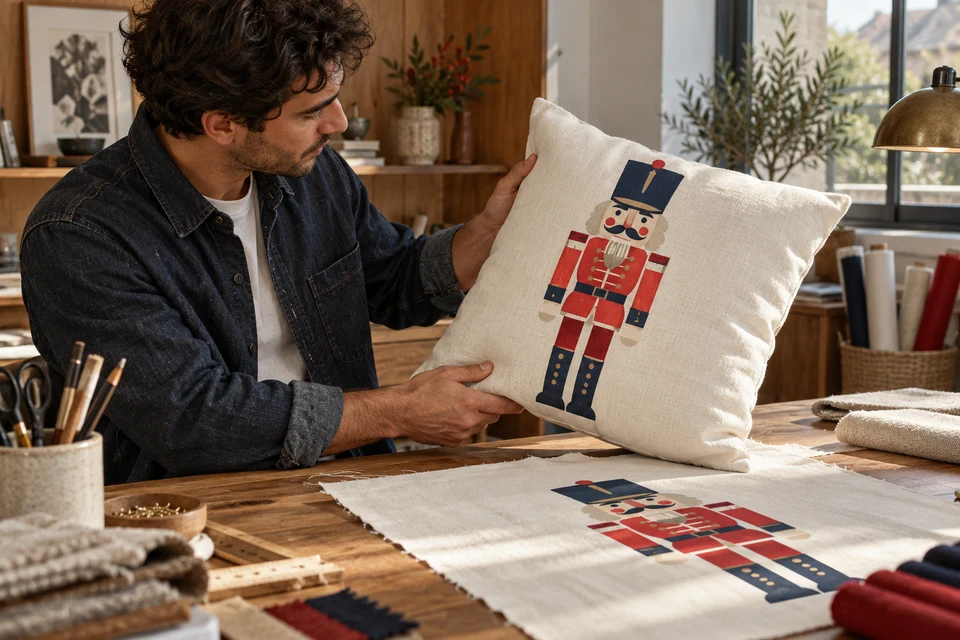
A single vertical nutcracker graphic gives a cushion a clear front and an easily recognized character. That clarity also makes placement errors conspicuous: a face pushed toward a seam or boots disappearing around the lower curve can change the design. The buyer's task is to approve an engineered print on the finished cushion, not merely to accept a centered image on a rectangular file. Keep artwork ownership, printing scope, shell construction and the intended filling arrangement in the same development conversation.
Identify the landmarks that must remain visible
The character needs more than a bounding box
Mark the eyes, face center, top of the hat and lowest boot point on the artwork reference. Identify which areas must remain fully visible and which background areas may enter the seam allowance. A bounding rectangle around the whole figure is useful, but it does not explain the visual priority of the face. Provide an approved front convention and identify whether the character should stand vertically when the cushion rests normally.
Place these landmarks in the product specification pack. Confirm that the supplied artwork is authorized for the intended use and that any supplier revision needs review. Do not substitute a different recognizable character or add branding simply to fill empty space. Ask the printer to show how the artwork relates to the cutting and sewing references before a completed sample is made.
- Mark face, hat and boot landmarks independently.
- Separate essential artwork from permissible seam-area background.
Connect the print placement to the cut panel
Centering on cloth is not necessarily centering after sewing
Review a printed panel with the proposed finished seam line identified in the development record. Ask which reference governs cutting and how the print is oriented relative to it. Compare the left and right visual margins, but also examine the space above the hat and below the boots. A panel can be mathematically centered while giving the character an awkwardly crowded upper edge.
Link this review to the seam specification. Record the agreed placement and tolerance approach with the actual fabric and construction, rather than inventing a universal clearance distance. If piping, a flange or another border is added, review the visible face again. Such details can reduce the apparent artwork area even when the outer cushion dimensions and the printed character size remain unchanged.
- Review finished seam references on the printed panel.
- Recheck visible margins after adding a flange or piping.
Approve the figure on the filled cushion
Curvature can move landmarks out of the main view
Use the intended insert or filling arrangement and let the cushion rest without pinning its corners. View the face straight on, then from a normal sofa angle. Observe whether the hat, boots or outer arms curve away from the visible front. Keep a flat-panel photograph beside the filled view so that a change caused by loft is not confused with a printing or cutting error.
Use the insert and cover ratio review to freeze the relevant filling scope. If the buyer chooses a fuller insert, check the character placement again rather than approving the shell in isolation. State whether the product is cover-only, supplied with an insert or permanently filled. A styled image of a full cushion should not obscure a cover-only commercial offer.
- Observe all four character extremes on the ordinary filled shape.
- Tie final artwork approval to the accepted filling scope.
Adapt each size rather than shrinking the whole file
A square and a rectangle create different character relationships
For each offered cushion format, prepare an artwork placement reference and decide whether the figure's scale or surrounding background changes. Stretching the original file can distort the face and body. Keeping the figure unchanged may instead leave too much empty space or crowd the seams. Make that design decision explicitly and approve a representative completed sample for the changed aspect ratio.
Retain size-specific views in the retail photography record. Keep colors, fabric texture and print appearance tied to the accepted physical reference. Do not digitally reposition the face on listing images to conceal a production placement that was never approved. Editorial generated imagery can illustrate the purchasing issue, while actual samples remain the authority for the merchandise and its color representation.
- Use a separate placement map for every aspect ratio.
- Do not stretch the character to fill a new format.
Choose the retail fold around the recognizable front
The packed image should still identify the product honestly
Trial the proposed retail pack and observe which part of the figure is visible through any window or front presentation. Avoid a fold that makes the face appear severed or leaves only an unrecognizable fragment. For a cover-only pack, show the folded shell honestly and identify any insert shown elsewhere as a separate supply decision. Review the unpacked front before arranging it for photography.
The packaging review process helps connect the pack to the approved shell. Ask for minimum quantities and sample requirements for each artwork-size combination, and confirm feasible dispatch planning before a seasonal commitment. Reusing a print screen, file or color palette does not by itself establish that another size has completed placement approval. Release the specific artwork, shell and pack combination together.
- Check the recognizable front in the actual retail pack.
- Release artwork, shell size and packing as one identified combination.
Send FY Bedding authorized artwork with face, hat and boot landmarks, the required cushion sizes and filling scope. Request a printed cutting reference and completed samples. Approve the character on the natural filled shape before finalizing the retail pack and listing images.