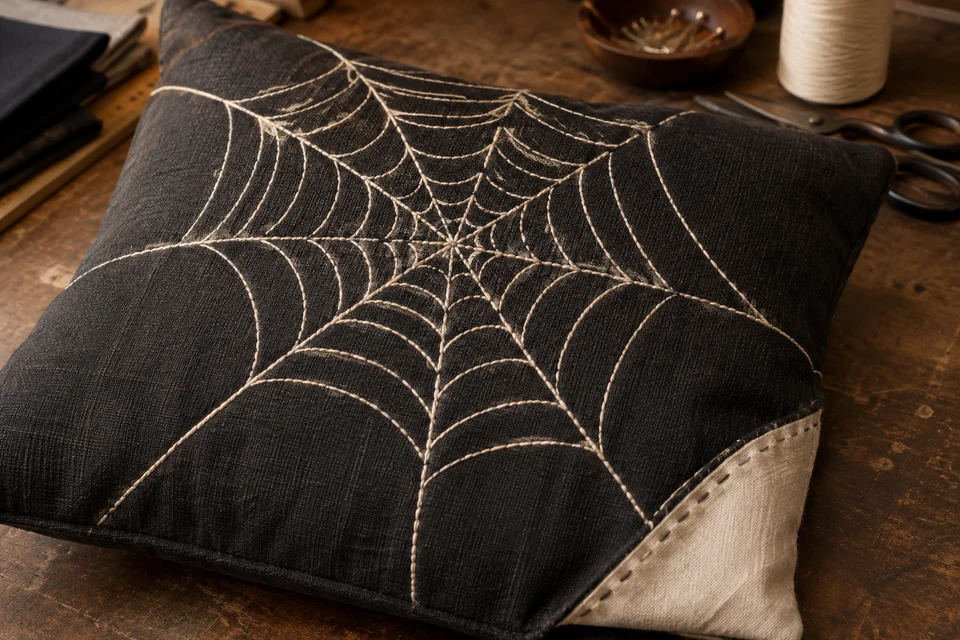
Spiderweb embroidery depends on connected lines and an intentional center. A sample can look convincing when flat but become visually uneven on a filled cushion. Buyers should approve the stitched geometry on the intended cover and insert, not rely on an artwork preview or a generic embroidery swatch.
Locate the center in the finished view
Decide whether the web is centered or deliberately offset
Mark the web center relative to finished seams, not only the edge of the unsewn panel. An offset design can be attractive, but it should look intentional after the cover is filled and the corners pull into shape. State which radiating lines are expected to reach an edge and which terminate within the face.
The embroidery artwork approval guide covers the broader file-to-sample process. A spiderweb adds a particular challenge: many lines visually converge, so a small center shift can change the balance of the entire face. Review the artwork over a finished-size outline, including seam allowances only as technical information. Keep the shopper-facing approval view free of those allowances so the team is judging what will actually be seen on the cushion.
- Mark center position from two finished edges.
- Identify intentional edge exits and internal line endings.
Inspect the crowded crossing
Judge the actual stitch result under ordinary light
Request a stitched sample in the proposed ground fabric and thread. Look at the center from normal viewing distance and close up. Decide whether it should appear as a distinct small knot-like focal point or as an open intersection of delicate lines. Then examine whether the sample achieves that appearance without an unintended heavy patch, loose thread or visible gap.
Do not prescribe a universal stitch density from a photograph. Ask the embroidery specialist to propose settings and return physical variants if the center needs refinement. Note which variant changes were made so a visually improved sample can be reproduced. Check both front and back, including any remaining support material; the related backing-residue review helps keep that inspection separate from the decorative design. A neat front alone does not describe the finished inside surface.
- Retain a close photograph of the accepted center intersection.
- Identify thread and ground fabric for every compared sample.
Follow each radial line
Review continuity rather than overall resemblance
Trace the stitched lines from the center toward the outside. Look for unintended interruptions, double sections, abrupt changes of direction and curved connectors that stop short of their intended junction. Compare the sample with the approved drawing, allowing only the textile variation that the buyer has actually accepted. An overall impression of a web can conceal several local defects.
Inspect under side light as well as soft frontal light. If the ground surface draws into visible ridges, record the condition and ask the supplier to investigate on the real construction rather than guessing the cause. The puckering review guide provides a useful distinction between an appearance observation and a supported diagnosis. Here the immediate buying decision is whether the stitched face matches the agreed reference, not which machine adjustment must be responsible.
- Track each spoke and connector against the approved artwork.
- Describe visible surface distortion without inventing a technical cause.
Fill the cover before approving it
The insert changes the viewing surface
Fit the intended insert and position the cushion as it will be displayed. Inspect the web straight on and at a three-quarter angle. Compare the center location, line spacing and edge exits with the flat cover. If the outer spokes disappear around the sides, decide whether that is the desired effect or whether the design needs a smaller visible footprint.
Review insert-to-cover ratio and loft before changing embroidery to compensate for an unsuitable insert. Record insert dimensions and fill profile with the accepted image. Where covers are sold without inserts, keep photography notes distinct from any claim that every customer insert will give the same shape. Check zipper access and the inside surface during filling, without turning this visual review into a promise of durability or wash performance.
- Approve both flat and filled versions of the same sample.
- Record the insert used in the merchandising photograph.
Make repeat inspection practical
Use a short defect map and a real reference
Create a simple inspection map covering the center, outer spokes, connectors and edge exits. Use sample photographs to show what the team should accept or hold for review. Avoid a vague instruction such as perfect embroidery: it gives neither the supplier nor the receiving team a workable reference for the inevitable judgment calls around a stitched design.
If the product will be washed, confirm the care proposal and required appearance evidence with the technical team. The care-label checklist is a separate release step; an attractive fresh sample does not establish an appropriate care claim. Send FY Bedding the web artwork, finished cover size and intended insert details when discussing this Halloween program. Agree sampling, acceptance limits and quantities before attaching a seasonal launch commitment to the design.
- Keep a filled reference sample and a close-up defect map.
- Approve care wording only against the relevant construction and evidence.
Is the web center intentional and the line network continuous on the filled cushion, with the same sample traceable back to the approved artwork?